Friday, 16 June 2017

Hydroponics - A New Project

I'm currently in the preparation and exploration phase of a new project. This one's been in the back of my mind for a while now, however a trip to Ikea last week finally got me off the ground.

The principle is simple...home-grown strawberries. In theory this should be simple...I have a garden, and a degree (of sorts) in Biology. The downside is that I'm terrible at gardening (especially the dull, weeding and maintainence stuff), our garden is not great for growing stuff, and I haven't used my degree for a couple of decades! Most strawberries you buy are not actually grown in the ground, instead using the funky sounding, but really rather simple concept of hydroponics.

Hydroponics - growing stuff without soil. The plant instead grows in an inorganic medium, and is supplied with a nutriet mixture (i.e fertiliser and water). The sterile growing medium stops issues with disease and slugs, and in theory it's all rather low maintainence. Ikea seem to think it's for everyone, and have started marketing a simple, indoor hydroponics kit for general use.

I've bought a couple of these sets, and while the final goal is a rotating crop of strawberry plants, I'm starting with something a little simpler to check the gear, and also see how good I am at killing stuff. At one week in, it's looking OK.

The kit I have is composed of;
1) A nursery - this is where seeds are initially placed, onto stone wool plugs which are then suspended in a reservoir of tap water. No fertiliser is needed initially, as seeds contain everything the plant initially needs

2) Cultivation units - I have 2 of these, with 8 spaces in each. once the seedlings are ~6 days old, with a couple of leaves showing, they are transferred here, still in the stone wool plug, and embedded in ground pumice, which is the long term growing medium. The pumice is again suspended in a water reservoir, however now fertiliser is added to support the plants as they grow.

3) Grow Lights - these are LED full spectrum lights that replace the sun for the plants. This means that they can be grown anywhere indoors, and can also be provided with light 24 hours a day, speeding up growth. These lights are bright...very bright. I have them in my office, and I've constructed some light baffles around them on a shelf, giving them plenty of space, but not lighting up the house at night.

Ikea provide good notes and documents, as well as all the extras you need (fertiliser, growing mediums, suitable seeds), and for the initial run-through I'm following their notes closely. I currently have 8 White cabbage plants and 8 Pak Choi sitting in the cultivators, about 1 week into their life. It's all been reasonably painless, and apart from pumice going everywhere it's been a clean process. I have no doubt strawberries will provide different challenges, however I have some time before that second phase kicks off, as plants will not normally be available for sale until autumn or winter.

Continue Reading...

Chocolate Cupcakes

Sometimes you just want something simple. I think pretty much everyone starts with cupcakes, and if all else fails you probably have everything you need to make some right now!

What I'm pretty bad at is decorating the blighters...I prefer contrast colour, and for these I didn't have anything light to hand. I ended up using horrible, horrible silver balls, and then I had a brainwave, and remembered some fudge sweets we had, sliced them up and used them...much better!

My key suggestions for good cupcakes;
1) Bake 'em at a low'ish temperature, it stops them "peaking"
2) Use a muffin tin and muffin cases. The shallower bun tins are too miserly
3) Weigh the cake mixture into the cases...it's a bit of a faff, but you end up with everything perfectly sized
4) Really, really let the cakes cool before icing them
5) Make sure your butter and eggs are at room temperature...if nothing else it makes mixing a lot easier

Chocolate Cupcakes - Recipe

  • Pre-heat oven to 150'C
  • Check you have a 12-hole muffin tin, and 12 muffin cases

Sponge Ingredients

  • 3 large eggs
  • 175g butter (room temperature)
  • 175g caster sugar
  • 150g self-raising flour
  • 25g cocoa powder

1) Place the butter, eggs and sugar in a stand mixer with the paddle attachment

2) Mix hard until as smooth as possible

3) Add the flour and cocoa powder and mix until smooth and combined

4) Spoon 45g of the mixture into each muffin case. You may have some left, however  Ifind this amount is just right for a good sized cupcake in a muffin wrapper

5) Bake for 20 minutes. This should be just right to bake the cake, have a decent dome without "peaking", and to fill the muffin case fully

6) Remove from the oven and leave to cool completely on a wire rack. While they are cooling, make the buttercream

Chocolate Buttercream Ingredients

  • 150g butter (room temperature)
  • 270g icing sugar
  • 30g cocoa powder
  • Milk
1) Place the butter in a stand mixer with the paddle attachment

2) Sieve in the icing sugar and cocoa powder into the bowl

3) Mix (starting slowly, unless you like cleaning) until smooth

4) Add a splash or two of milk, to soften and smooth the mixture more. You can keep mixing it to make it lighter and lighter.

5) Transfer the icing to a piping bag with a large, semi-closed star nozzle attached

6) Pipe a generous swirl onto each cupcake (you can practice onto a plate, an then scrape it back into the bag). You know you have the texture right when it finishes into a smooth point, rather than tearing.

7) Decorate with something in a constrast colour
Continue Reading...

Thursday, 15 June 2017

Hazelnut Paris-Brest

I've tried this before, but as a single large item. This had all sorts of issue, and it sort of collasped under it's own weight. This time I did individual ones, using a slightly more tested choux recipe. For the filling I decided to ressurect the hazelnut butercream I made a while ago for some slightly lacklustre macarons.

This was all a little rushed, so the choux was not the prettiest, though I did enough notes and photos to do a "Choux Basics" post. I made 17 buns, though in retrospect I should have made 12 or 15 slightly larger ones, as that was all the filling I had. I personally think that they needed an additional filling to add some more creaminess (I'm thinking creme patisserie, or perhaps mix the hazelnut butter into a creme pat...), though taste feedback said they were good as they were.

Paris-Brest - Recipe

Choux Pastry

I made a batch of Choux Pastry, piping it into 7-8cm rings on silicone mats.

These were then carefully brushed with egg yolk, and a scattering of flaked almonds added on top before being baked in the oven. They were baked for 25 minutes, then left to cool in the oven to dry them out, before completing cooling on a wire rack.

Hazelnut Buttercream Ingredients

  • 200g hazelnuts
  • 140g butter (room temperature)
  • 140g icing sugar
  • 25g cocoa powder
  • Milk
1) Place the hazelnuts in a food processor with the blade attachment

2) Blend the hazelnuts until they form a smooth, butter-like mixture. This will tkae a while, and you'll need to scrape the sides down a few times

3) Transfer the hazelnut butter to a stand mizer with the paddle attachment

4) Add in the butter, and sieve in the icing sugar and cocoa powder

5) Mix until a smooth, light texture is achieved. You may need to add a small amount of milk to get a good piping texture.

6) Transfer the icing to a piping bag with a semi-closed star nozzle attached

Assembly

1) Slice the choux buns in half

2) Pipe the icing onto half of the bun

3) Place the other half of the bun back on top

4) (optional) sprinkle with a little icing sugar
Continue Reading...

Choux Pastry

Choux pastry by itself doesn't have that much in the way of flavour, but it's a very good container for soft, high-flavour fillings. Most people know it for chocolate eclairs, but there are also profiteroles, Paris-Brest and religeuse.

I find it very temperature sensitive, and with my oven I tend to do it at 180-190'C. Drying the pastry is vital, so once it's done baking leaving it in the oven with the door cracked for 5-10 minutes can really help get the crisp, crunchy texture you're looking for. Once out of the oven it cools really quickly, so it's worth spending a little extra time to get it right.

The mixture of flours (50% plain, 50% strong) gives the final mixture a bit more strength and crispness. You can do it with just plain flour, however it may not be quite as strong structurally.

This recipe quantity will make approximately 15 Eclairs or Paris-Brest buns.

Choux Pastry - Recipe

  • Pre-heat oven to 180-190'C
  • Line a large baking sheet with paking parchment or a silicone mat

Ingredients

  • 100g full fat milk
  • 100g water
  • 100g butter
  • 3g salt
  • 8g caster sugar
  • 60g plain flour
  • 60g strong white flour
  • 3 large eggs
1) Place the milk, water, butter, salt and sugar in a large saucepan. You're going to be adding other ingredients, and stirring a lot, so err on the side of a larger pan.


2) Heat the mixture gently, while stirring, until the butter has melted and all the sugar and salt have dissolved.

3) While continuing to stir, bring the heat up to medium until the mixture is just beginning to boil.

4) Remove from the heat

5) Pour in the flour and stir vigorously until you have a consistent, smooth mixture


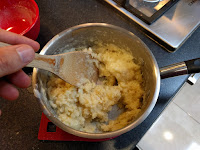
6) Return the pan to a medium heat and stir vigorously for 3-4 minutes. The mixture should become more elastic and glossy, and begin to pull from the sides of the pan when you stir it.


7) Transfer the dough to a stand mixer with the paddle attachment and mix for 2-3 minutes. You'll get a lot of steam come off, and you're looking to cool the mixture down a bit before adding the eggs (you don't want them cooking)


8) Add the eggs in one at a time, while continuing to mix on a medium speed. You want each egg fully combined, and a smooth mixture, before adding the next.


9) Continue to mix for anther 2 minutes so you have a very smooth, soft pastry paste.


10) Transfer the mixutre to a piping bag. You ideally want to use a star nozzle when piping, as this gives whatever you are piping room to expand when baked. For Eclairs, pipe straight , ~15cm tubes as neatly as possible. For Profiteroles and Religieuse pipe tight buns. For Paris-Brest pipe discs about 5-6cm inches across

11) Bake in the oven for 25-30 minutes. Keep an eye on them, as the pastry can burn quite quickly towards the end, as it's so thin. You can improve the cripsness by sprinkling a very small amount of water on the baking sheet before placing them in the oven.

12) Once they are done, turn the oven off, crack the door open, and leave in there for another 5-10 minutes. This allows any excess moisture to leave the pastry, leaving a crisp finish. If you are filling the pastry (profiteroles, eclairs etc) you can quickly add holes where you are going to fill them before this cooling phase, and this will help the steam escape.

13) Remove from the oven and leave to cool fully on a wire rack before cutting/filling/decorating.
Continue Reading...

Wednesday, 7 June 2017

Pizza Dough

It's easy to forget that pizza is a bread dough...and it's actually incredibly easy to make, though a bit of patience will give you the best results.

This is a recipe I worked on a couple of years ago (before I was writing everything up on here). I found a bag of the dough sitting in the freezer...sadly it was no longer viable, however it spurred me on to make up a new batch from my ancient hand-written notes. The base of the recipe was to try and replicate a Dominos pizza base, my personal favourite. I spent a few evenings reading up on the subject...Dominos are obviously fairly secretive about the exact composition, however I did find out;
  1. You need very high protein flour
  2. You want a slow prove
  3. You can freeze the dough (and this is how most Dominos receive their dough)
  4. Polenta = Cornmeal = maize flour
  5. The hotter, the better
  6. My oven has a pizza-specific setting

The core ingredients are pretty simple, and this recipe will make 2 x 14" thin crust pizzas. For the toppings, just go wild. I use a jar of pre-made pizza topping, and then throw various things on (the photos here are chorizo, mushroom, onion and cheese).

The base recipe is here...I have modified it, and also turned it into sensible numbers! There are a couple of bits of specific kit you need;
1) A proving tub that fits in your fridge. I use a Really Useful Box that just happens to be the right size for proving a 500g flour batch of dough (you've probably seen it in photos before). The other item is a pizza baking tray...these typically have holes over the bottom to allow the moisture to escape, and for the base to crisp up.

Pizza Dough  - Recipe

Ingredients

  • 500g very strong white flour (I used a 15% protein flour)
  • 320g warm water (~40'C max)
  • 10g caster sugar
  • 10g yeast
  • 10g salt
  • 25g olive oil
1) Mix the sugar and yeast into the warm water with a fork, and leave for 5-10 minutes until it begins to bubble

2) Place the flour, salt and olive oil into a stand mixer with the dough hook attachment

3) Begin to mix, and slowly pour the water/yeast mixture in to form a dough

4) Mix on a medium speed for 10 minutes, until you have a smooth, soft, stretchy and glossy dough

5) Oil a container, and place the dough in there

6) Place in the fridge to prove for 24 hours. This is important, as you want a really soft, stretchy dough. It should roughly triple in size.

Assembly

  • Polenta / Cornmeal / Maize Flour (to roll in)
  • Toppings to taste;
  • Tomato sauce
  • Meat
  • Vegetables
  • Cheese
  • Anything really!
Note - the dough recipe makes 2 batches, each of about 425g. You can freeze the dough, so after you've knocked it back place one ball in a plastic bag, and freeze. To use this, get it out in the morning and let it defrost naturally (no microwaves!). It should soften, and begin to expand again...then you can knock it back and use it normally.

1) Pre-heat the oven to 250'C. My oven has a pizza setting, where the base of the oven is heated up to make the base crispy (and you then put the pizza right at the bottom)

2) On a lightly oiled surface, knock the dough back, and split in half

3) Using a rolling pin, start rolling out a circle to match the pizza baking tray. It should be springy, so you'll also need to hand stretch it

4) Once it's to size, scatter polenta across the work surface, and press the dough into it on both sides

5) Place the pizza on the baking tray

6) Top as you see fit (traditionally tomato sauce, toppings, then cheese)

7) Place in the oven for 8-10 minutes

8) Slice and eat

Continue Reading...

Monday, 5 June 2017

Chilli, Chocolate and Cherry Flapjack (small batch)

It was glorious weather at the weekend, so it was time for some long hours on the bike, and for that I needed some fuel.  I didn't want to do a full batch of the cycling flapjack...partly as it would involve getting some more fructose sugar, and partly it then sits in the fridge, and I have a habit of eating it. So, instead, I did a half-batch of a tweaked variety...which also happened to use some chocolate I picked up cheaply that had chilli in it...a new experiment!

This is a slightly softer flapjack than the cycling one, mainly due to more wet ingredients. To serve it I chopped it up into 5cm x 5cm slices, and then wrapped them in foil-lined baking parchment, and popped them in a jersey pocket, where they went down very well! The heat from the shilli is actually quite pleasant, and comes through after the sweetness.

Chilli, Chocolate and Cherry Flapjack

  • Pre-heat oven to 160'C
  • Line a 20cm x 15cm tin with baking parchment (this is officially a battenberg tin, but it works well for small traybakes as well)

Ingredients

  • 30g butter
  • 80g sliced banana
  • 40g golden syrup
  • 80g caster sugar
  • 1 large egg
  • 100g condensed milk
  • 250g rolled oats
  • 50g dried cherries
  • 50g dark chilli chocolate, chopped
1) Place the butter, banana, golden syrup and caster sugar in a large saucepan

2) Place over a low heat, and mash the banana and butter until smooth, and the sugar has fully melted/dissolved

3) Remove from the heat

4) Stir in the condensed milk

5) Whisk in the egg

6) Add the oats and cherries, and stir until combined and everything is coated

7) Place half the mixture in teh prepared tin, and level

8) Spread the chopped chocolate over the mixture evenly

9) Spread the remainder of the mixture over the top of the chocolate, endeavouring to cover it entirely

10) Bake for 20-25 minutes, until golden and firm to the touch

11) Remove from the oven, and leave to cool on a wire rack

12) Chill overnight, then slice and wrap
Continue Reading...

Lemon Drizzle Cake

Never done it before...how weird is that?

This was something I threw together one evening, literally as I had a couple of eggs, and a couple of lemons lying around, and the weekly shop was the day after. It was a proper "chuck it all in the bowl" recipe, and the only thing that was un-expected was the cooking time (far longer than I had expected). Once the syrup was in, and the cake was not screamingly hot I moved it to the fridge to chill overnight, then it was eaten (with gusto) the day after...

Lemon Drizzle Cake - Recipe

  • Pre-heat oven to 150'C
  • Grease and line a 1lb loaf tin

Sponge Ingredients

  • 120g self-raising flour
  • 120g butter
  • 120g caster sugar
  • 2 large eggs
  • Zest of 2 lemons
1) Place all the ingredients in a stand mixer with the paddle attachment

2) Mix until smooth, but stop as soon as it is (you don't want to beat the air out)

3) Scrape the mixture into the prepared loaf tin, and level the top

4) Bake for 30-40 minutes, until a skewer comes out clean

5) While the cake is baking, prepare the syrup

Lemon Syrup Ingredients

  • 75g caster sugar
  • Juice from 2 lemons
1) Mix the sugar and lemon juice in a small bowl, stirring constantly until most of the sugar is dissolved

2) When the cake comes out of the oven, stab it all over with a skewer to create plenty of holes

3) While the cake is still hot, carefully pour the syrup over the cake, trying to get as much down the holes as possible

4) Leave to cool completely


Continue Reading...