Tuesday 28 June 2016

Coffee, Walnut and Chocolate Tart

This was my second attempt at doing a coffee and walnut tart...the first one was inflicted on some cyclists, and the feedback was that there needed to be more walnut, and the coffee was either right, or not quite strong enough (cyclists love their coffee!).

For this one, I used a much deeper tart tin (so more frangipane), put a lot more walnut pieces in, and also put a chocolate ganache on top. The coffee caramel sauce was basically the same. It certainly baked well, and generally happy with how it looks! I think it might want more chocolate on top (I used the same recipe as I used for the opera cake, but I have a large jar of it left). It's effectively a chocolate brownie tart at this point!

Make the coffee-caramel ahead of time, and store it in an airtight jar in the fridge. You won't need all of it, but a teaspoon of it makes a great addition to a cup of hot chocolate!

Coffee, Walnut and Chocolate Tart

 Coffee-Caramel Ingredients

  • 200g caster sugar
  • 125ml water
  • 100g butter
  • 100g double cream
  • 4tsp milk
  • 8tsp coffee granules


1) Mix the milk and coffee granules, removing any dry lumps, to soft a thick (and very bitter, don't lick the spoon) blend

2) Place the sugar and water in a small saucepan over a medium heat

3) Heat the water and sugar until the sugar has all dissolved, then turn the heat up a little

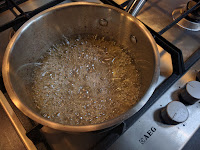
4) Keep boiling the mixture until it turns a golden brown (this will happen quite quickly, be ready to take it off the heat quickly!)

5) Remove from the heat and whisk in the butter and cream
6) Pour in the coffee mixture and continue to whisk

7) Once fully mixed and combined, return to a low heat until the mixture just begins to boil again

8) Pour into a large jar, and leave to cool and thicken (best done overnight)

9) Pre-heat the oven to 180-190'C

Sweetcrust Pastry Ingredients

  • 300g plain flour
  • 120g caster sugar
  • 120g cold butter
  • Pinch of salt
  • 1 egg
  • 20-30ml cold water

1) Put the flour, sugar, salt and butter into a food processor with the blade attachment

2) Whizz until the mixture until it resembles breadcrumbs

3) Add the egg while still mixing

4) Slowly add the water until a dough just begins to form (you may not need all of it)

5) Turn the mixture out into a cold bowl, and knead a few times until a dough forms

6) Flatten it to a disc, wrap it in cling-film, and chill it for 30 minutes

7) Once chilled, place on a lightly floured surface, and roll out to 3-4mm thickness in a circle large enough to line a deep 23cm tart tin

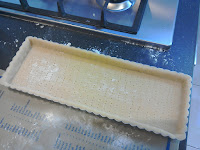
8) Line the tart tin, tucking the sides down, and leaving any spare overhanging

9) Prick the base of the tart with a fork all over

10) Line the pastry with cling-film and baking beans/dry rice

11) Bake in teh oven for 12 minutes

12) Remove the cling film and beans, then return to the oven for another 7 minutes, until the base of the pastry is just starting to brown a little

13) Remove to a wire rack

14) While the pastry is still hot, take 4-5 tbsp of the coffee-caramel sauce and spread it out over the pastry...the heat of it will soften it, allowing you to form an even layer

15) Trim the spare pastry off the edges of the tart

16) Turn the oven down to 160'C

Filling Ingredients

  • 150g ground walnut (I used a food processor to blitz walnut pieces)
  • 150g softened butter
  • 150g caster sugar
  • 3 eggs
  • 75g plain flour
  • 100g walnut pieces

1) To make the frangipane, put the butter and sugar in a stand mixer with the paddle attachment

2)  Mix until light and creamy

3) Add the eggs, and mix hard until thoroughly combined (you may need to scrape the sides down)

4) Add the ground walnut and flour, and mix until combined

5) Sprinkle the walnut pieces over the coffee-caramel in the tart

6) Put the frangipane into a piping bag, and pipe it over the walnut pieces, filling the tart

7) Bake in the oven for 35-45 minutes, until fully cooked and risen

8) Remove to a wire rack to cool

Ganache Ingredients

  • 180g plain (50% chocolate)
  • 100ml milk
  • 30g butter
1) Break the chocolate into a heatproof bowl

2) Put the milk in a small saucepan, and heat until just starting to boil

3) Pour the milk into the chocolate and leave for 30 seconds

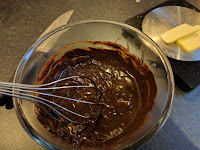
4) Whisk until the chocolate has all melted

5) Whisk in the butter

6) Leave to cool and thicken slightly

7) Spread over the top of the tart (you won't need all this recipe...place the spare in an airtight jar in the fridge)


Continue Reading...

Ham and Mushroom Loaf

Another fairly simple filled bread, again to be used as travelling snack food as I head round the south of the UK cycling. I've been trying to create a sort of swiss-roll effect, where the dough is rolled out, the filling laid over it, and then you roll it up. The biggest issue I'm hitting is getting the filling to be even, and also to not cause a big air bubble near the top. This time I tried slashing the loaf to provide an escape for any steam generated.


Ham and Mushroom Loaf

Dough Ingredients

  • 500g strong white flour
  • 10g salt
  • 7g fast action yeast
  • 30g sunflower oil
  • 300ml water
1) Put all the ingredients in a stand mixer with the dough hook attachment

2) Mix for 8-10 minutes, until the dough is smooth and soft

3) Place in a lightly oiled bowl, and allow to rise for 2 hours (or, as I did in this case, pop it in the fridge and prove it overnight)

Filling ingredients

  • 300g chopped ham (you want the decent deli-stuff, not the thin, wet slices)
  • Half a punnet of mushrooms
1) Chop the mushrooms to roughly the same size as the pieces of ham

Assembly

  • Poppy Seeds
  • Milk (to glaze)
1) Turn the proved dough out onto a lightly floured surface

2) Knock back, then roll out to a rectangle 30cm x 50cm

3) Sprinkle the ham and mushroom evenly over the dough, leaving a small gap at all edges

4) Starting on a short edge, roll the dough into a cylinder

5) Turn the ends under to seal the filling inside

6) Place on a baking tray lined with baking parchment, and leave to rise for 1½ hours

7) Pre-heat the oven to 200'C

8)  Brush the loaf with milk, using a pastry brush

9) Sprinkle the top with poppy seeds

10) Slash the loaf deeply 3-4 times diagonally

11) Place in the oven, and pour 500ml of water in a tray in the base of the oven

12) Bake for 35 minutes

13) Remove to a wire rack to cool
Continue Reading...

Thursday 23 June 2016

Huntley and Palmer Biscuits - Army Biscuit - Recipe Development

This is a recipe that really jumped out at me...there were several revisions, including one requested specifically from the War Office in 1914 towards the end of World War 1). I assume this would form a staple in ration packs. It should be a good one to start with, as it's fairly simple.


Original Ingredients List - Industrial Quantities

  • 280lb Flour (127kg)
  • 6ozYeast (170g)
  • 95lb Liquor (43kg/litres)
  • 2lb Lawn Sugar (900g)
  • 2lb Salt (900g)
  • ½lb Soda (225g)
OK...so it's got yeast in it, so we can assume that there is some mixing going on to form a smooth dough, but not so much that we form bread, and at least a bit of proving. Liquor is almost certainly just "water" (pretty much every recipe has it, and unless they made every biscuit with rum, I think it was just terminology).

Lawn Sugar is a grade of sugar, and on balance I think it's icing sugar. It's unusual in that there is an equal amount of salt and sugar, as well as a decent chunk of soda. I'm going to make a brash assumption here, and say that leavening agents in the 1900's were not as strong and effective as they are today.

There was a final note that up to 1/3rd of the flour could be substituted with rye flour, possibly to give some more flavour, possibly it if was cheaper I imagine. What I was able to find was a photo of the biscuit (not form the museum, but online)...square, with holes punched through regularly, a bit like a cream cracker. Square makes sense, as then there is no cut-off wastage, and I would imagine the government would want these cheap.

So, lets shrink this down to a more manageable batch, and use more modern ingredient names;
  • Plain Flour - 200g
  • Rye Flour - 100g
  • Yeast - 0.4g
  • Water - 100ml
  • Icing Sugar - 2.5g (1 level tsp)
  • Salt - 2.5g (1 level tsp)
  • Bicarbonate of Soda - 0.5g
I'm going to assume that yeast is a little more (the dried stuff we typically use now was only invented during World War 2, and not really available until the 1970's...the yeast here may well have come from a brewery).

As for method, I've looked at some other yeasted biscuits, and typically you mix the yeast and water, leave it to activate for a while, then mix into the dry ingredients, leave to prove for an hour, then roll (5mm thickness), cut, leave for a short period again, then bake. I'm going to assume 190-200'C is the temperature here...it's low in sugar, so not much risk of burning, and they should be done in 10-12 minutes.

Huntley and Palmer Army Biscuits - Modern Version

Ingredients

  • 200g Plain Flour
  • 100g Rye Flour
  • 5g fast-action yeast
  • 100ml Warm water
  • 5g Icing Sugar
  • ½tsp Salt 
  • ½tsp Bicarbonate of soda
1) Put the mix the sugar and yeast into the water, stirring with a fork, and leave for 10-15 minutes

2) Place the flours, salt and bicarbonate of soda in a stand mixer with the dough hook attachment.

3) Add the yeast and water to the dry ingredients, and mix until the dough is consistent

4) crape the dough into a lightly oiled bowl, cover with cling-film, and leave to prove for 1 hour

5) Turn the dough out onto a floured surface, and roll out to 5mm thickness in a rectangle

6) Cut squares about 8-10cm a side, and place on baking trays lined with baking parchment

7) Prick the biscuits all the way through in a grid pattern (about 1 hole every cm)

8) Leave to rise for about half an hour

9) Pre-heat the oven to 200'C

10) Bake the biscuits for 8-10 minutes

11) Remove to a wire rack to cool
Continue Reading...

Huntley and Palmer Biscuit Recipes - Intro

I spent a few hours on Monday at the Museum of English Rural Life, going through old recipe books for Huntley and Palmer. they are a huge company who have left their mark all over Reading...and they made a lot of biscuits!

After having done the Rich Traveller biscuits, I thought it would be really interesting to get some more recipes, and then see if I can re-create them, or use them as inspiration for more modern versions. The recipe books were all hand-written, often with notes, amendments, and often a "Passed by the Board" date, probably to do with any changes to the recipe and ingredients. There were a fe challenges in the task;

1) Weird imperial measurements, in massive quantities! The first recipe I looked at used 280lbs of flour!

2) Unusual ingredients. More specifically 2 ingredients that appeared a lot. "Stuff", and "Seal". I was able to find out a little bit about "Seal"...it was some product that was sold by a company called WJ Bush...they sold essential essences and oils (effectively food colouring and flavouring). I suspect that it was either a preservative, a colouring (to get the biscuits a more pleasing colour), or the turn-of-the-century equivalent of vanilla flavouring (ie, we put it in everything!).

"Stuff" has been more problematic. The original MERL post suggested it might be a spice mix (and thats what I used in the Rich Traveller biscuits), however it was in an awful lot of recipes, so I now think it might have been something like a preservative, or a flour whitener of some description.

3) Terrible handwriting. To be fair, it probably was considered quite neat, and these books were huge, so writing all the recipes down must have taken a long time.

4) Absolutely no methods. This is the biggest challenge, and knowing ingredients is one thing, however mixing the dough, shaping and baking it is another challenge entirely. For example, commercial refrigeration technology was available before the turn of the century, but was this used...did they chill the dough? Baking powder was not available until the 1930's, so for a light biscuit there is a mixture of soda (I'm assuming bicarbonate of soda) and tartaric acid (cream of tartar). There are also some yeast-based biscuits, often savoury.

 I was able to find illustrations of many of the biscuits, and the final look does provide some insight into the way they were made (for example, the majority are stamped or rolled, there are very few that look like they would have been a "melt" type biscuit).

One thing that was really noticeable, especially when compared to modern biscuits, is how vanishingly rare chocolate was. Coconut features, as does vanilla, almond, carraway seeds, and various fruit essences (no doubt provided by WJ Bush!).

So, the plan is to take these recipes, transform the list of ingredients into something you can buy at the supermarket, and make in a home-baking volume, and see where we get! The posts will probably be in 2 halves...firstly me deciphering the recipe, and then a second half about how the actual bake went.
Continue Reading...

Tuesday 21 June 2016

Coffee and Walnut Frangipane Slices

In amongst 2 failures last night, I was able to pull off a reasonably successful experimental bake. We have a bike race on Wednesday, and I wanted to take something along for the team to snack on afterwards. Coffee and walnut is a classic flavour combo, so I attempted to re-build it into a tart.

For the coffee part, I made up a batch of caramel sauce, with a strong kick of coffee added.Then, for the walnut, I made a walnut frangipane, using blitzed walnuts, and added in some walnut pieces to sit between the caramel and the frangipane, to give some crunchy textures...it all sits in a sweetcrust pastry case.

Coffee and Walnut Frangipane Slices

Coffee Caramel Ingredients

  • 200g caster sugar
  • 125ml water
  • 100g butter
  • 100g double cream
  • 4tsp instant coffee (to taste, but you want it pretty strong)
  • 3-4tbsp milk

1) Dissolve the coffee into the milk. Use as little milk as possible

2) Place the sugar and water into a clean pan over a low heat

3) Heat until the sugar has melted, then bring to the boil

4) Continue to boil until the mixture begins to turn a deep golden brown colour (but be careful not to let it burn)

5) Remove from the heat, and whisk in the butter, then the cream, then the coffee mixture

6) Return to the heat while whisking until it just starts to boil again (this just thickens it up)

7)  Pour into a glass jar and allow to cool

Sweet-crust Pastry Ingredients

  • 300g plain flour
  • 120g butter
  • 120g caster sugar
  • Pinch of salt
  • 1 egg
  • Chilled water
1) Put the flour, sugar and butter into a food processor with the blade attachment

2) Blitz until the mixture resembles breadcrumbs

3) Add the egg while still mixing

4) Slowly add the water until a dough begins to form

5) Turn the mixture out onto a cool surface, and knead a couple of times to form a smooth dough

6) Wrap in cling-film and chill in the fridge for 10-15 minutes.

7) Pre-heat the oven to 190'C

8) Roll the chilled pastry out to line a 23cm tin (I used a long 26 x 12cm tin instead)

9) Line the tin with the pastry, allowing the extra to hang over the edges.

10) Prick the base of the pastry all over with a fork

11) Line the pastry with cling-film, and add in baking beans/dry rice

12) Bake in the oven for 12 minutes

13) Remove the cling-film and baking beans, and return to the oven for another 5-6 minutes to dry and cook the base

14) Remove to a wire rack

15) While it it still hot, add 4-5 tbsp of the coffee caramel to the pastry, and allow it to melt and spread out evenly across the base

16) Turn the oven down to 170'C

Frangipane Ingredients

  • 100g butter
  • 100g caster sugar
  • 100g ground walnuts (I used walnut pieces that had been blitzed in a food processor)
  • 2 eggs
  • 50g plain flour

1) Put the butter and sugar into a stand mixer with the paddle attachment

2) Beat until light and soft

3) Add the 2 eggs, and beat in thoroughly

4) Add in the ground walnut and flour, nad mix until consistent

5) Put the frangipane into a piping bag

6) Pipe the frangipane over the slightly cooled caramel

7) Smooth the top out

8) Bake in the oven for 30-35 minutes

9) Remove from the oven, and cool on a wire rack


Continue Reading...

Baking Disasters

Didn't take many photos here, mainly as I was desperately trying to recover the bakes. I was attempting to make 2 things...a quiche, and a mille feuille. Lets go through what went wrong...

1) The Crème Patisserie was too thin. I used 5 egg yolks, 600ml of milk, 50g of cornflour, 40g butter and 125g of sugar. For the mille feuille, the custard needs to be fairly structural, so when I do this again I will probably use 2 egg yolks, and 2 whole eggs, then back to more "normal" volumes of 500ml of milk, 40g cornflour and 100g of sugar (then the same 40g of butter). I possibly
didn't quite cook it long enough, though it had definitely started to firm up as I was cooking it. I knew as soon as I took it out of the fridge it wasn't thick enough...it was dripping out of the piping bag, which is never a good sign.

2) The jelly didn't set. The above photo is of 400g of blueberries that have been blitzed in a food processor, run through a sieve, and then had 100g of sugar added before it's boiled up. I then added 2 bloomed sheets of gelatine.

2 SHEETS OF GELATINE IS NOWHERE NEAR ENOUGH!!!

A bit of investigation tells me that a sheet of gelatin will set 100ml of liquid. I probably had closer to 400ml, and fructose is a gelatin inhibitor. 5-6 sheets would be what I'm looking for.

3) The rough puff was too thick, and brick-like. The recipe I was following had the rough puff held between 2 baking trays to keep it fairly firm...in retrospect this is not a good idea, and i'll let it expand naturally next time. I did a "normal" load (400g flour, 200g fats), and this was too much for my small baking trays...I should have rolled it thinner, or get bigger baking trays.

4) My shortcrust went weird. OK...this is the one I'm not so sure on. I did a "normal" load, which I've done several times before, using a food processor to do the bread-crumbing (300g plain flour, 120g butter), however after chilling it was very resistant to rolling, and ended up way too thick (5-6mm, when I normally got for 3mm). It cracked and crumbled, and baked very hard (probably as it was too thick).

My only saving graces are that the quiche filling was very nice, and the blueberry goop (sort of half-set jelly) has a lot of flavour. The creme pat, while liquid, still has that strong vanilla flavour. I was able to quickly do a sweetcrust shell (I had some left-over from my halfway successful bake from last night, which will get it's own post), which I put the blueberry into, and put the custard on top...it was un-cuttable, but it got the ingredients used!

The jelly and crème pat I know how to resolve. I think the puff pastry is solveable as well, simply rolling it thinner, and not doing the compression should be enough. I need to do shortcrust again, and soon, as I have no idea what went wrong there...


Continue Reading...

Saturday 18 June 2016

Ham and Onion Savoury Brioche Loaf

I did a savoury couronne last week, which looks nice and pretty, but isn't the easiest thing in the world to actually eat. I decided that this week I'd do something similar, but using a traditional 2lb loaf tin. The main reason for this one was to have something to take to a race to eat before/after...basically posh sandwiches!

I used some ham from Waitrose that comes pre-chopped in pots, and also a favourite of mine...caramelised onion, to give it some acidity. As with all enriched doughs, it took a while to prove, and unfortunately I got a bit air bubble under the crust...

Ham and Onion Savoury Brioche Loaf

Dough Ingredients

  • 500g strong white flour
  • 4 large eggs
  • Milk to 350ml (see 1 below)
  • 200g softened butter
  • 10g salt
  • 7g fast-action yeast
1) Crack the eggs into a large measuring jug, and top it up to 350ml with milk

2) Beat the eggs and milk together

3) Place the flour, salt and yeast in a stand mixer bowl with the dough hook attachement

4) Pour in the egg/milk mixture, and mix until a dough has formed

5) Add the butter piece by piece, allowing it to incorporate fully before adding the next piece

6) Continue to mix for 8-10 minutes...the dough should be fairly sticky and soft

7) Scrape into an oiled bowl, cover with cling-film and prove for ~3 hours, until doubled in size

Filling Ingredients

  • 180g chopped ham
  • 1 red onion
  • 1tbsp sunflower oil
  • 1tsp soft brown sugar
  • 2tbsp sherry vinegar
  • 10g dried wild mushrooms

1) Put the sunflower oil in frying pan over a medium heat

2) slice the onion finely and add to the pan.

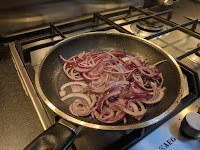
3) Sprinkle the sugar over the onion, and cook for ~10 minutes, until soft and starting to golden

4) Chop and add the mushrooms, and cook for 5 minutes more while stirring

5) Take off the heat, stir in the vinegar, and leave to cool

Assembly

  • 10g melted butter
1) Grease and line a 2lb loaf tin with baking parchment


2) turn the dough out onto a floured surface, knock back, and form a rectangle about 25cm high and 50-60cm long

3) Spread the ham out evenly along the dough. Spread the onion mixture out evenly over this

4) Starting at a short end, roll the dough tightly, forming a cylinder about 25-30cm long (you're aiming for this to fit into the loaf tin)

5) Place in the laof tin, and leave to rise for ~2 hours

6) Pre-heat the oven to 200'C

7) Brush the loaf with the melted butter

8) Place in the oven, and pour 500ml of water into a pan in the base of the oven

9) Bake for 35 minutes

10) Remove to a wire rack to cool
Continue Reading...

Thursday 16 June 2016

Orange and Cardamon Opera Cake

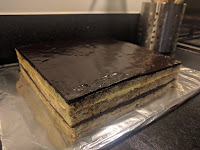
This is a recipe from John Whaite, winner from Series 3 of GBBO. The recipe is on his website, and I won't bother re-typing it here, as he goes through it far better than I could. instead, I'll go through the various components, and how I found making them. Generally, I'm really pleased with how the cake looks...nice, cleanly defined layers, and the sponge got a decent rise to it, which I'd like to think is down to improvements in the way I fold mixtures!


Biscuit Sponge


This isn't a description of a sponge I'd come across before, though I understand it now...in many ways it's similar to a genoise sponge, but with a lot more dry ingredients. It's certainly a lot of eggs! (4 eggs and 5 egg whites...the yolks are sitting in the fridge in a ramekin of water, waiting to be turned into custard). I was concerned that folding the egg and nut mixture into the meringue was going to be tricky, but they actually went together OK, and I was able to keep a reasonable amount of air in them.

Once it's baked and cooled, it's actually fairly firm (hence where I think the "biscuit" descriptor comes from...that or I over-baked it!), and quite easy to cut. It also took on the soaking syrup fairly well...again I was concerned that this would run off the surface (concerned enough that I put some fork holes across each slice), but it went in OK.

I'd love to find somewhere that sells ground pistachio (or pistachio flour, as it's apparently also known). I make it by whizzing pistachio kernels in a food processor, but it's not as fine and consistent as I'd like...good if you want texture, but not it you want a well-crumbed cake.

Soaking Syrup

I made a slight mistake here, and added the orange juice before I boiled the mixture...not sure what impact this would have had. otherwise it has the nice acidic citrus flavours you want. I would say the cardamon did not come through as strongly as I expected. I used the juice from 2 medium oranges (which I'd zested for the buttercream), and kept a small amount of the juice aside for the buttercream as well

Chocolate Ganache

This was a slightly different way of making ganache to anything I've done before...using hot milk to melt the chocolate, and then adding in butter afterwards, and it worked really well! It's much easier working with milk in a saucepan, and it melted the chocolate far better. I possibly let it cool a little too much before assembly.

Orange Buttercream

This was a surprisingly basic buttercream (I now half-expect everything to use meringue bases, or egg yolks)...simply butter and orange zest whipped together, then sugar and orange juice added in. The recipe says to whip it for a long time, and it's definitely one where a stand mixer rescues you.

Mirror Glaze

I was really pleased to find this recipe on  the website...it's something I've been wanting to try for ages, as it's a great presentation skill. It uses a lot of cocoa powder, and it's also very adhesive (when I was trimming the cake, the glaze would stick to anything it touched). I think I put it onto the cake a little too cool, and it didn't quite run enough, though I have the lovely shiny finish still, after levelling it with a palette knife. Next time I may give it 10 seconds in the microwave to make it a bit runnier. I really like that it can be prepared ahead, and re-heated.

Assembly

I think the key tip here is the use of a hot knife to get nice, clean edges to the cake. This is almost certainly the neatest cutting I've done, and with the layers of this cake, that's really important. I'll admit to skipping a couple of the chilling stages, as the cake was fairly firm and stable as I built it up. I chilled it before topping off with the ganache (which I did a lot of smoothing on, to try and keep the cake as square as possible), and before applying the mirror glaze, and then again before trimming the edges. The cake was in the fridge overnight before I sliced it up (again with a hot knife).

Continue Reading...

Monday 13 June 2016

Low Calorie Fruit Pot

One thing I really struggle with is keeping my weight down... When I say this most people roll their eyes and go "you're not fat". I then normally grumble, and suggest they hang out with cyclists for a while!

My actual core diet is pretty decent...I do a lot of food prep on Sunday's, and this covers my breakfasts and lunches for the rest of the week. I am, however, a massive snacker. I have a huge sweet tooth, and also happen to love creamy textures. If it wasn't for the fact I cycle so much, I'd be immensely overweight! I've said for this year I'm not going to worry too much about my weight, however it's notable that it is sneaking up, so I had a look at my diet in general terms.

It turns out that my"core diet" (what I eat for meals) is massively under what it needs to be. I have a basal metabolism in the region of 1750 calories/day...my core meals were coming to 1200 calories, giving me a shortfall before exercise of about 550 calories...no wonder I snack so much!

So, over the next couple of weeks I'm going to redress this, and add in some improvements to my diet that should reduce the snack cravings. The biggest challenge is that the majority of snacking happens at work, so I need to plan and have healthy alternatives available...ideally something that satisfy my want of creamy, sweet treats! So, I did a bit of reading and investigation. I was looking for ingredients that were not calorie dense (so it feels like I'm having a big meal, but not laying on the calories). ideally I want protein to be there in reasonable proportions...with the amount of cycling I do, I should be taking on 80-90g of protein a day. I don't really want to resort of protein powders...if for no other reason I get bad wind!

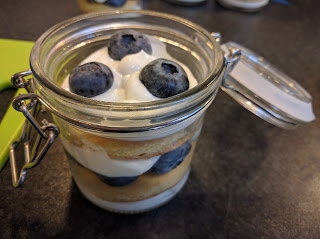
After a bit of investigation, I came up with a plan/challenge...fill a 300ml kilner jar with a dessert that looked and tasted great, and get it under 150 calories. The first attempt is not too bad, and with a bit of trimming I reckon I can get it down more. There are 3 key ingredients;
1) A fatless sponge, using xylitol instead of sugar, and chopping the flour ration down a bit
2) Greek yoghurt, with a zero-calorie caramel flavouring (normally used for coffee!)
3) Blueberries

The end result looks pretty good, though I think with a couple of tweaks I could do better. Ideally I'd whip the yoghurt to give it a lighter texture, and a bit more volume, however even with pre-strained yoghurt I couldn't get it to hold air. I think that if I add an emulsifier (the most common one being soy lecithin), I can get it whipped up. I had some trimmings from the sponge which I ended up eating, but I could easily put those at the bottom of the pot to give more volume (the calorie calculations include the trimmings). For fruit I could use other berries (strawberries, raspberries), or even other fruit entirely. I might be able to squeak a bit more flour out of the sponge (trying to avoid turning it into a meringue!). First attempt, a shade over 170 calories a pot...happy with that! If they work over this week, I'll make a batch of them on a Sunday, and take them into work throughout the week, hopefully stopping the visits to the snack machine...

Blueberry Pots

  • Pre-heat oven to 200'C
  • Grease and line a swiss-roll tin with baking parchment
  • Get 6 300ml kilner jars (diameter 70mm)

Sponge Ingredients

  • 3 large eggs
  • 75g Xylitol (lower calorie sugar-substitute...I bought it from Holland and Barrett)
  • 60g self-raising flour
1) Put the eggs and xylitol into a stand mixer with the whisk attachment

2) Whisk hard until pale, thick and creamy...you're looking for a raised trail across the mixture when the whisk is removed. This took ~8 minutes for me

3) Sieve and fold in the flour carefully, removing all the dry pockets

4) Pour into the prepared  swiss-roll tin, and tilt gently to get the mixture into the corners

5) Bake in the oven for 7-8 minutes, until the mixture is just pulling away from the edges

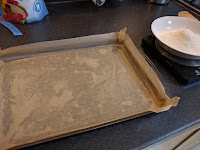
6) Turn out onto a wire rack with a layer of baking parchment on top, and peel off the baking parchment from the bottom

Assembly

  • 500g strained, fat-free yoghurt (I used Fage 0%, as it's the thickest)
  • Squirt of Caramel Flavouring (I use this stuff, which is to all intents and purposes calorie-free)
  • 60 Blueberries

Note - I assembled these on a set of weighing scales, so I could get the right amount of yoghurt into each layer

1) Using a 70mm circular cutter, cut 12 discs from the sponge

2) Beat the yoghurt and caramel flavouring together, and place in a piping bag

3) Snip off the end of the piping bag, and pipe ~25g of yoghurt into each jar

4) Place a sponge circle into each jar, pressing down gently

7) Place 7 blueberries into each jar

8) Pipe ~25g of yoghurt into each jar, over the blueberries

9) Press a second sponge circle gently into each jar

10) Pipe ~25g of yoghurt into each jar (be careful, you'll only just have enough...if you do have spare, split it between each jar evenly)

11) Place 3 blueberries into each jar

12) Close the lids, and keep in the fridge until needed.


Continue Reading...