Saturday 27 August 2016

Jaffa Cakes (GBBO Technical Challenge)


I have a feeling that millions of these things will have been made all over the UK this weekend. Great British Bake Off is back, and this was the first technical challenge. I watched, and thought "I can do that", so I got up early this morning, and went for it, working without a recipe.

There are 3 parts...a fatless sponge, orange jelly, and chocolate. The sponge is simple...I do it every week, though doing it with a small volume was slightly trickier. The jelly was OK, though when I do them again (for work on Tuesday) I'll add more gelatin for a thicker set, and possibly add a little less water. I think that the jelly in jaffa should have a bit of a chew to it...this was set more like a desseert jelly. Finally, the chocolate was piped over, then smoothed with the back of a teaspoon.

They are still setting downstairs, but I've had one...and they taste like a jaffa cake! Success!

I was tempted to do the sponge similar to a macaron, by piping a circle, but chickened out and went with the bun tray.

I did the same sequence as the contestants were recommended to do on the show (jelly, sponge, chocolate).

Jaffa Cakes - Recipe

Jelly Ingredients

  • Juice of 1 orange (about 120g)
  • Zest of 1 orange
  • 35g caster sugar
  • 50ml water (maybe add a little less for a firmer jelly)
  • 3 sheets of gelatin
1) Place the gelatin sheets in a bowl of water, and allow to bloom for 4-5 minutes

2) Line a small baking tray with tin foil, making sure there are no holes, and the base is flat.

3) Put the juice, water and sugar in a small saucepan, and gently bring to a simmer

4) Remove from the heat

5) Wring out the gelatin sheets, and stir into the orange mixture until dissolved

6) Pour the jelly into the lined tray, and place in the fridge/freezer to set

Sponge Ingredients

  • 1 large egg
  • 25g caster sugar
  • 25g self-raising flour (sifted)
  • Butter (to grease)


1) Pre-heat the oven to 200'C

2) Grease a 12-hole bun tray with the butter

3) Put the egg and sugar in a medium sized bowl
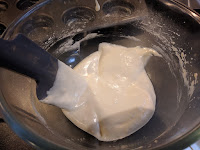
4) Using a hand mixer, whisk until at the "ribbon stage" (where if you lift the whisks out, a trail is left on the surface)...this will take 7-8 minutes. The mixture volume is too small to use a stand mixer really.

5) Carefully fold in the sifted flour, keeping as much air in the mixture as possible.

6) Split the mixture evenly between the 12 bun indents. It's about 1 large teaspoon each hole. handle the mixture carefully, as you want to keep as much air in it as possible.

7) Place in the oven for ~4 minutes. They will cook quickly, so keep an eye on them. As soon as they start to pull away from the sides of the bun tins, they are done.

8) Remove from the oven, and turn out onto a wire rack to cool

Chocolate Coating

  • 100g plain chocolate (70% cocoa solids)
1) Melt the chocolate carefully over a bain-marie

2) Once it is melted, remove from the heat and allow to cool slightly

3) Transfer it to a small piping bag (this makes it easier to get an even coverage when you are assembling)

Assembly

1) Once the jelly has set, pick a circle cutter that is about 2/3rds of the diameter of your sponges

2) Cut 12 circles of jelly, and using a knife/palette knife place each one in the middle of a sponge

3) Pipe chocolate around and over the jelly

4) Smooth the chocolate with the back of a teaspoon. You can, once the chocolate is a little cooler, do a set of ridges on top.

5) Leave to set


Update

So I did a couple more batches, playing around with the recipe a bit. using 70% dark chocolate gave much better results (you were able to get a thinner coating on). I also used pure orange juice, more gelatin, and added the zest of the orange into the jelly as well. I've updated the recipe above.

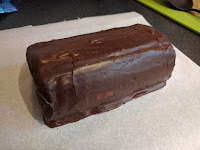
Finally, for a bit of fun I made a giant one...and then ate it!


Continue Reading...

Friday 26 August 2016

Scones and Blueberry Jam

I had an extra punnet of blueberries sitting around (I can't exactly remember why, but it was probably over-enthusiastic shopping), so I decided to turn them into jam. That led onto "what can I put jam on", so I made some scones.

I'm not sure I've ever made "just" scones before. I dug out a recipe from Mary Berries "Simple Cakes", and about half an hour later the kitchen was smelling good! I definitely know that you don't want to overwork the mixture. Really pleased with how they came out (I should make them more often! I should definitely make jam more often, only I eat it all...)


Continue Reading...

Battenburg Cake

I've always said that you can be as experimental as you like, but the classics will always win a popularity contest.

Battenburg is a great example of this. Once you get over the colours, it's actually fairly simple to make (it's a simple 3-egg butter sponge, with half of it coloured pink, and then a bit of careful cutting, apricot jam, and some marzipan). making your own marzipan is both simple, and far, far nicer than shop-bought stuff (typically shop marzipan is 75% sugar, whereas home-made stuff is 50%).


I have a special battenburg tin, though you don't need one, it just saves a bit of cutting. As you want sharp edges, rather than line it with paper, I tend to grease and flour it, which gives cleaner results.
Continue Reading...

Carrot Cake

Another "for the cyclists" recipe...this is probably the most popular cake you can ever make. The recipe I use is a Delia Smith one. I had a prolonged discussion in a coffee shop with the "raisins vs walnuts" argument, and there was no general consensus...this recipe uses raisins, however the one I was eating in the coffee shop had walnuts, and that was also delicious!

I particularly like this recipe as it's incredibly moist. It's in effect a drizzle cake, as a syrup of lemon and orange is added to the cake as soon as it;'s out of the oven, and then it cools in the tin, allowing the juice to be sucked back in. The only thing it isn't is that pretty, though there are rarely any complaints.

The recipe is here. Quark can be bought in most supermarkets (typically with the cheese, though I've also seen it hiding in the cream and yoghurt section...). It's "low fat", but it's definitely not healthy...
Continue Reading...

Oat and Raisin Cookies

I did another batch of these for cyclists. I did experiment with "carrot cake" cookies, but it's safe to say that they were not a success...far too wet.

This recipe is nice and reliable, and the only downside is that I can only do 6 at a time in my oven (I need to get better at using both shelves, and probably also get bigger sheets).

Recipe is here (second one down)
Continue Reading...

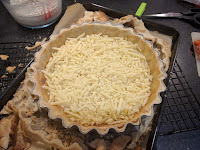
Bacon, Onion and Tomato Quiche

Again, one of my favourite, thought with a new, much deeper tin...no-one has ever complained about too much filling in a quiche!

I took advantage of the deeper tin (it's a 23cm tin, but about twice the depth of my older ones), I put some cherry tomatoes in on top of the layer of grated cheese at the bottom. These give it a lighter texture and taste, and work well with the smoked bacon and caramelised onion.

I actually didn't like the older tins I had, as they had handles built in, but this made getting to the edge really tricky, and I've gotten in the habit of doing the blind bake with the pastry un-trimmed, then doing the trim afterwards (it's a bit of a fiddle, but you g a nice clean edge, and no darkened bits).

I'm also a great believer in making sure your quiche is "to the brim"...a good shortcrust is all very well, but quiche is about the decadent filling!


Continue Reading...

Pork and Cider Picnic Pies

Nothing too fancy here...another couple of savoury pies to eat on the go.

I used a couple of 1lb loaf tins, a hot water crust, and a filling made from cider, pork, carrots, mushrooms and parsnips. It's simmered for a couple of hours to make it really tender, then you add a fair chunk of cornflour to thicken the fluid up. I add the vegetables in for the last half hour of the cooking, to stop them going too mushy.

I love pies like this...really practical, and a great way of using stuff up. A bit of stock, and a good slow cook, and pretty much anything tastes amazing. The combination of pork and cider is one of my favourites, and the added sweetness of the parsnips and carrots really works well.


Continue Reading...

Danish Pastries

OK, these probably deserve a bit more writing up. I did 2 loads...first one for work, and then a second load for a post-race cycling snack. The brief was "something with raisins", so I did an apple and raisin filling.

The dough is fairly simple. It's a fairly simple quick brioche, and then it's folded over with softened butter in between. Handling the dough is a right PITA, as it's really soft by the end of the process (for stuff like laminated pastry you tend to chill the dough a lot more, so it's firmer), and I was working on a very heavily floured surface, as the dough was pretty sticky....however the end result was delicious.

The recipe was from the ever reliable Mary Berry's Baking Bible. The first time I tried a number of different shapes, and also a creme patisserie filling, however for the second batch I stuck with the apple and raisin filling, and a kite-shape pastry, which was a pleasing one to look at (and looked fancier than it was!)


Apple and Raisin Danish Pastries

Dough Ingredients

  • 450g strong white flour
  • ½tsp salt
  • 350g softened butter
  • 7g fast action yeast
  • 50g caster sugar
  • 150ml warm milk
  • 2 eggs (and some beaten egg to glaze)

Filling Ingredients

  • 450g cooking apples
  • 15g butter
  • juice and zest of ½ lemon
  • 60g light muscavado sugar
  • 75g raisins

Without going into detail, you make the dough normally (with 50g of the butter rubbed into the flour), then after the first prove laminate the dough with the rest of the butter, doing 3 fold in total with 15 minutes in the fridge after each one. Then roll out squares(lots and lots of flour on the surface here) about 10cm wide and 5mm thick, put some filling in (which is pretty quick to make...cook down the apples wit the sugar, and add everything else), and fold them...leave them to rise for 20-30 minutes, then bake them at 200'C for 15 minutes.

You can then drizzle a little water icing over them to make them look posh.

You'll probably have cut-offs...I turned these into spiral danishes by rolling out a rectangle, and then layering sugar and raisins over it and rolling/slicing.

Continue Reading...

Swiss Roll variations

I had a bit of a muck around making swiss rolls...mainly as I had an excess of eggs, and other ingredients.

For some reason I had a real hankering for a chocolate-mint swiss roll, but suspecting it may be rather...potent, I also did a more classic one with raspberry jam and whipped cream. I then, later, went mad, and tried a yoghurt based mint filling for a second attempt. Fatless sponges are great practice for folding flour into foamed eggs.


Swiss Rolls

Sponge

  • 4 eggs
  • 60g sugar
  • 40g self-raising flour
  • 30g cocoa powder (for a normal sponge this is also flour)
  • ½tsp cream of tartar

Filling - Mint buttercream

  • 160g butter
  • 320g icing sugar
  • Splash of milk
  • A few drops of peppermint flavouring

Filling - Mint yoghurt

  • Strained Greek yoghurt (Fage) 
  • Icing Sugar
  • A few drops of peppermint flavouring
  • 3 sheets of gelatine


Filling - Normal

  • 3 tbsps raspberry jam
  • 150ml double cream - whipped
Continue Reading...